Tuesday, July 31, 2012
Thursday, June 21, 2012
s'mores cupcakes please

I have a big appreciation for S'mores. Being an import to the US I've only gotten to know the beauty of a s'more in the last 10 years and of course I am a fan. I've been craving s'mores this summer but since I don't have a bonfire to go to on a regular basis I found another way to get the taste of gooey marshmallow, buttery grahams and decadent chocolate. This recipe is adapted from one that was on Martha Stewart but I used cake mix and soda to try and cut the calories a little.

Recipe makes 24 full size cupcakes.
Heat your oven to 350F and line 2 cupcake tins with cupcake liners.
Part 1 - Graham Cracker Base
2 packets of graham crackers (not two boxes I mean the packages inside the box.
1/4 cup of sugar
1/3 cup of melted butter
Smash up the graham crackers and then mix in the melted butter and sugar. Once combined put about 2 tablespoons of crumbs into each cupcake. Then take a small glass and even out the crumbs about 1/4 inch thick). Save a little to sprinkle on the cupcakes at the end.
Part 2 - Chocolate Shavings
2 7oz bars of premium chocolate.
Using a small knife finely chop the chocolate and put about 1 tablespoon in each cupcake on top of the graham layer. Save a little chocolate to sprinkle on top of the finished cakes.
Bake the graham cracker bases with the chocolate on top for about 6 minutes or until the edges are golden brown. The chocolate on top will just be softened slightly - that's okay. Take these out of the oven then start on the cake part of the cupcake leaving the graham crackers with a chance to cool.
Part 3 - Cake mix
1 box of cake mix
1 can of soda
I used the old soda trick to cut the calories in these cupckaes. It's actually the first time i have done this and the only difference i noticed was that the next day the cupcakes seemed to shrink away from the paper. So if you are using this recipe and want these to be ultra presentable make them the day of.
Add the cake mix on top of the base and fill holes to about 3/4 full.
Part 4 - Frosting
1 7oz jar of Marshmallow Fluff
3/4 - 1 cup of powdered sugar
1 cup of butter
Mix it all up and while it's nice and soft pipe it onto the top of your cupcakes. Garnish cupcakes with leftover crumbs and chocolate.
Part 5 - EAT!

PARTY ON - LINK PARTIES!!
Wednesday, June 20, 2012
m.i.a.
I haven't been posting lately for a few reasons - little vacation, potty training and 3 days a week in grad school. I have a few fun things I am planning so I'm looking forward to sharing those. Watch this space :)
Sunday, May 27, 2012
chalkboard closet
I've wanted to use chalkboard paint for a long time so when decorating my son's room I knew there was a chance to get creative with a chalkboard. I went through a number of ideas before i landed on this one - a chalkboard closet door.

I like the fact that I can write messages on here, whether for encouragement of just to remember what we are doing that day and therefore what he needs to wear. I also like that the low level of the board on the bottom makes it the perfect doodle spot for him now.

A quick tip on using chalkboard paint - read all the instructions about curing. Frankly, I was not aware of the process and how many coats I would need (x5) or the time I would have to wait before using the surface (3 days). It seemed to take forever and for my 2.5 year old the wait was torture but we are so pleased with the outcome that it was worth the wait.
Hope everyone is enjoying the long weekend.
I am linking to some super link parties - check them out.
Thursday, May 17, 2012
novel wall decor
Generally I would be opposed to chopping up books for almost anything. But as my little boy's room began to take shape I needed to find some fun things to put on the wall.

I had two matching frames that went with the previous 'girly' guestroom style that was there previously. You can see one below. They were from Marshall's I think.

I took out the pictures of the flowers which was a bit tricky because the backs of the frames was firmly sealed. But with a bit of tuggin' and pryin' (and swearin') I got the backs off without causing too much damage.
So, what to fill them with? I went online to Amazon and did a search for kids' cowboy books. I found this cute little one and did a "quick look inside" to see what the pictures were like.

Sure enough there were two pages that were perfect. You can see the finished product below. The book was $2.99 and in excellent used condition so it was a cost effective way to get some updated artwork in his room. The best part was that the pictures were from the front and back inside cover pages so the book is still completely readable.

I have shared this post at some funky link parties - check them out here.
Wednesday, May 16, 2012
tote bag birthday gift
My best friend had a birthday recently and she asked me to make her a tote bag. As the busy mom of two little boys she needed a bag that was stylish but big enough to hold everything that she carries around on a daily basis.
Here she is modeling the new bag. The only change I made to the tutorial was to give her extra long handles to suit her 'tall drink of water' frame.

For her birthday I got her a gift card to a fabric store and so chose the fabric and had it sent to my house. I think this is a really good idea if you are planning to make something special for a friend. It was great for her to be able to choose the pattern and style that she wanted. Ironically she choose a fabric that is the same pattern I have on my outdoor furniture but in a different color. There are many reasons we are best friends, which now includes the fact that we have the same taste in fabric.

We found this bag tutorial on Delia Creates. It is very simple and the pockets are perfect for a mom that carries a phone, keys, bottles, diapers, snacks and the kitchen sink. The fabric she choose has such a great bold pattern that works really well on the bag.


The only shame is that her birthday was in March and she didn't get the bag until now! Oh, well!
I'm sharing this bag on some fun link parties. Check them out here.
Tuesday, May 15, 2012
double the love
Yesterday was my birthday and Sunday was Mother's Day so I've been feeling very loved. On Saturday we went for lunch and stopped into an antique shop and finally found what I've been looking for. Add some cupcakes and it couldn't be more perfect. Hope you all had a lovely Mother's Day.


Saturday, April 21, 2012
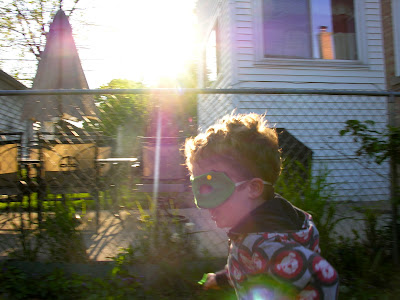
superhero mask - tutorial & pdf
It is a superhero love fest in our house at the moment. "The guys" have to go everywhere with him, even to bed. I decided to have a go at making a simple superhero mask and all of sudden, best mum ever! I even had to make a second one for myself or Daddy to wear. As soon as he put it one he was out zooming around the garden and showing me examples of "incredible strength" as he puts it.
Tutorial:
Materials:
8 - 10 inches of 1/4 inch soft elastic depending on your little one's noggin.
10" x 6" of felt or other material - 2 pieces.
PDF template
Note - if you use another material other than felt you might want to add fusible interfacing for support.

Print out PDF and cut out template.
Place PDF on both pieces of material with wrong sides facing. Pin and cut.
Measure the elastic by putting it around your little person's head and pulling it slightly so that it will stay put. Cut. Hint - use a small scissors to cut the eyes out.

Place elastic between the front and back, like a sandwich with right sides facing each other. Pin.

I found it helpful to pull the elastic through one eye hole to be sure I wouldn't sew over it.
Sew all around the mask with a 1/4 inch seam leaving a small hole to turn it right-side out.

Cut notches for turning or use a pinking shears as I have done below.

Turn right side out and hand sew the small opening shut.
Zig zag stitch around the eye holes. This is tricky. I used the smallest zig zag stitch on my machine. Don't worry too much about perfection - kids don't notice :)

That's it, the mask is ready!

And your superhero is ready to zoom!

The "green lantern ring"on his finger is literally a strip of felt tied with a knot. I love imagination.
I am sharing this post at some fun link parties - check them out.
Thursday, April 19, 2012
Sunday, April 15, 2012
lilac and butterflies
My lilac bush is at peak at the moment and I have cuttings all over my house - the smell is fantastic. These beautiful flowers have attracted a lot of butterflies to our garden so it's a double treat. This post is a little tribute to my Dad who gave me the camera I used and who, apart from everything else that is wonderful about him, is an amazing and inspiring photographer. Happy Birthday Dad.


Monday, April 9, 2012
easter recap

We had a great day yesterday and I just wanted to share some of the photos I took and some links to a few fun crafts and recipes.

First off, how cute is he? I made the bow-tie from this awesome tutorial. It really was simple to make so I will definitely be adding a few of these to his wardrobe.
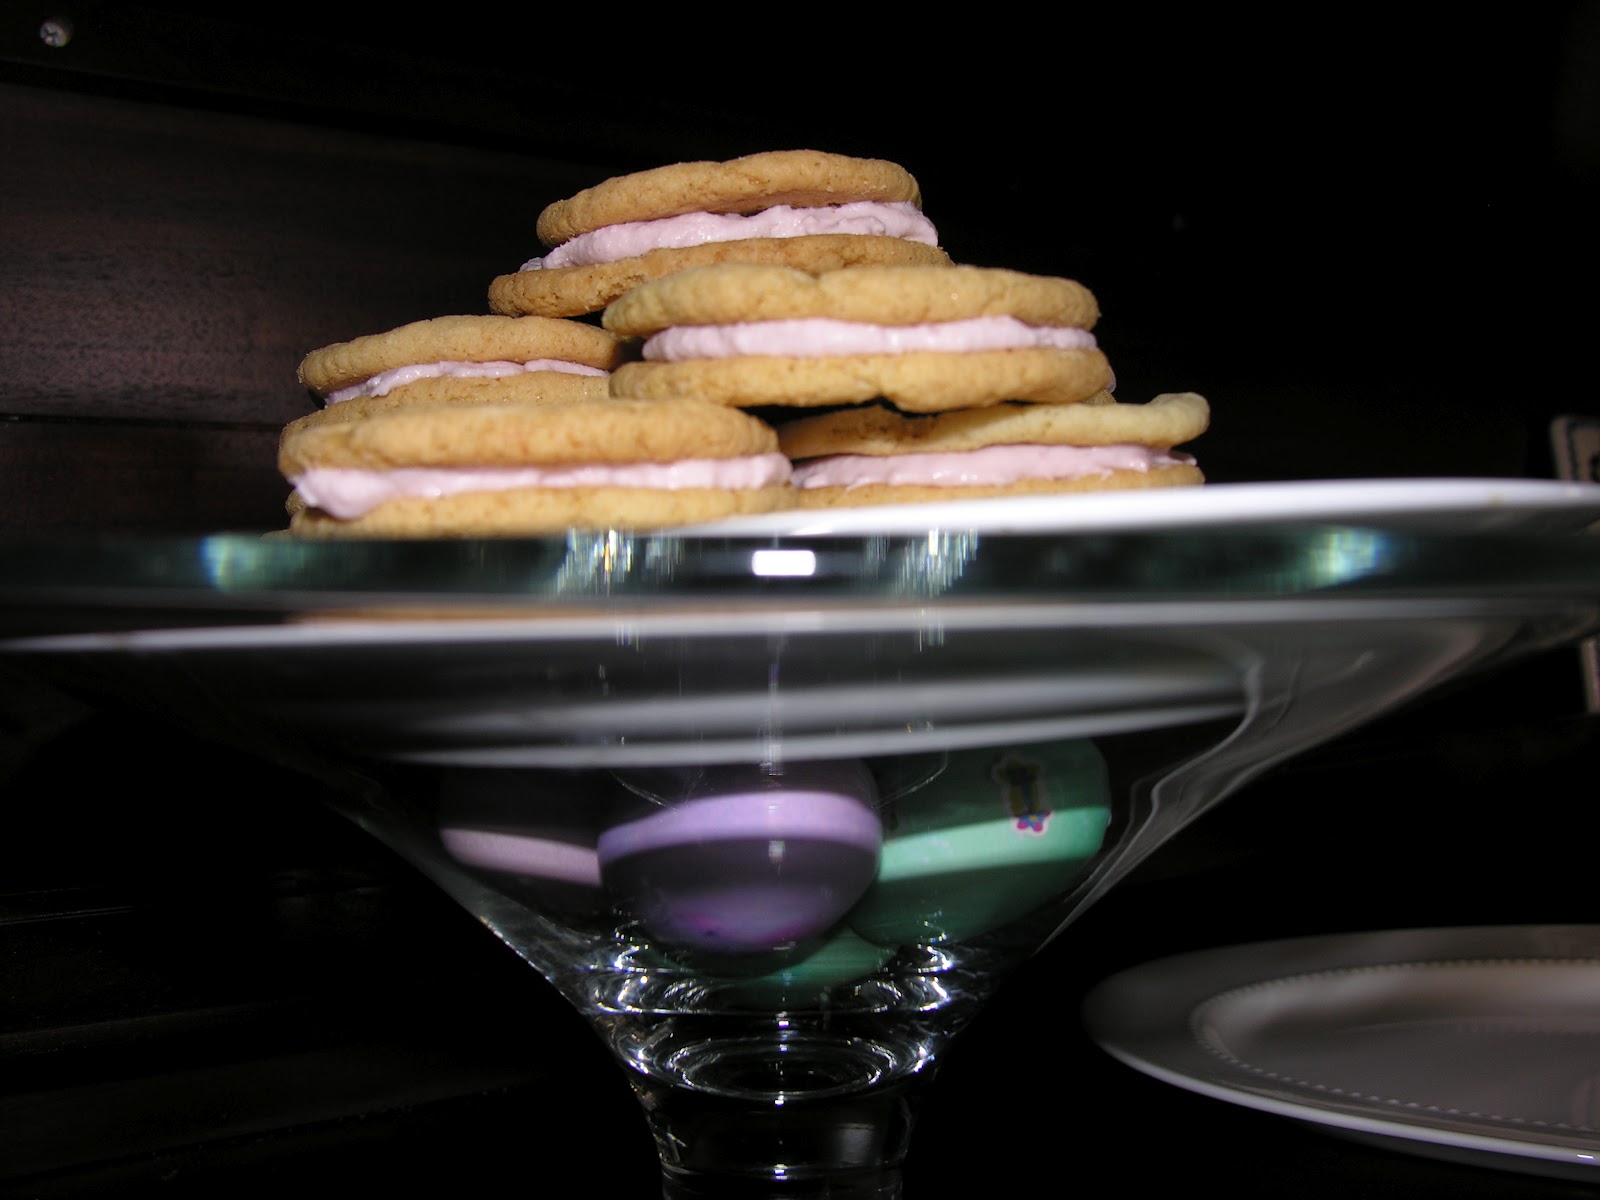
I made Martha's vanilla bean cookies with raspberry white chocolate cream. Did you know vanilla bean is so expensive? The original price in Jewel for one bean was $14. Thankfully it was on sale for 50% off but still the price tag on these cookies including the premium white chocolate and raspberries was probably over $20. They were good but next time I will make do with just vanilla extract.

I used lemons in the vase with pretty lilac from my garden. Usually we wouldn't have much at this time of year but the kooky weather brought them on earlier than usual. I thought the lemon water would kill the flowers quickly but they are still perky today.

I made these deviled eggs. The adults looked a bit suspiciously at them but the kids loved them and this plate was empty in no time.

I set up the kids for some crafting with some $1 mask kits that I got at Michael's and some Easter coloring book pages.
Great day.
Monday, April 2, 2012
embroidered onesies - tutorial
Embroidery is an easy way to personalize and beautify simple items. It is especially nice for anything baby related. For this project I picked up a couple of white onesies for about $5 and turned them into something a little more special.
To start out find the center of your garment so you know where to place the wording. Then using your embroidery hoop to stabilize the garment lightly write out the word you want to embroider in pencil. I write so lightly that you can barely see it but it's enough to guide you and then it will come out easily in the wash. You could also find some word art online to help you design your embroidery but I just free hand it.

I used a simple back stitch for this. It is the most basic of stitches but it is nice and neat and for a lightweight garment like this it seems to work best. Just remember that when you are starting your first letter that you go one stitch length in from the bottom so you can back up to where you actually want the first stitch to be.


The felt flowers are simple to make and you can find good tutorials for them here and here.


This kind of project makes for a great baby gift and of course you could personalize the garment with a name.

I'm sharing this project at some super cool link parties - check them out.
Wednesday, March 28, 2012
Pintrest Recipes
I am sure we are all the same, surfing pintrest, choosing recipes that we think sound and look really great, pinning them and then....nothing.
This week I decided to actually have a go at some of the recipes I found and let you know how it went. I'm going to use an extremely simple rating system I've devised - Make it or Skip it. Of course these are only my opinions and I'm a long way from the "Oprah Effect".


This week I decided to actually have a go at some of the recipes I found and let you know how it went. I'm going to use an extremely simple rating system I've devised - Make it or Skip it. Of course these are only my opinions and I'm a long way from the "Oprah Effect".
Source: tablefortwoblog.com via Marie Claire on Pinterest
Honey Bourbon Chicken
We all really enjoyed this and I would recommend it. I used 4 boneless skinless chicken breasts although the recipe calls for chicken thighs. The breasts stayed moist and melted in your mouth so you can use either. I also like this because the cooking time is 3-4 hours on low in a slow cooker. This works well for me because I usually only think about dinner after lunch so sometimes I just don't have the time to make other slow cooker recipes. This is a Make it!

Hungry Girl EZ Cheesy Lasagna
I needed to adapt a lot of this recipe. It says that you only need 2 sheets of lasagna. I have to say this seems impossible to me. It's a make for 2 recipe but the thing I like about Lasagna is it's freezability (new word?). It's a good idea using the eggplant as a layer but there are better low fat lasagna recipes out there. Skip it.
Low Carb Chicken Enchilada Bake
This is really excellent. The genius part of this recipe is the fact that instead of cream or sour cream you use blended cottage cheese. I have never even thought of that before but it is a perfect cream substitute. It's just the right amount of spicy and you can add or remove the amount of cheese on top. I had seconds - Make it!Cucumber Feta Rolls
Hope you enjoyed this post. If nothing else it has helped me learn how to spell recepie, reciepe, recipe.
I'm sharing this post at some cool link parties - check them out.
I was going to a girlfriend's house for dinner so I thought I would bring these along as a healthy appetizer. It's hard to slice the cucumber to look this pretty and in the time it took to drive there (30mins) the filling and the water from the cucumbers created a soupy mix in the bottom of the dish. This made them look just a little less appetizing than this photo. Skip it.
Subscribe to:
Posts (Atom)